Not every receipt needs to match a store you can pick from a list. Sometimes the fastest way to get exactly what you need is to start with nothing and build it up yourself, one section at a time.
Free Receipt Maker
What Is a Receipt Maker?
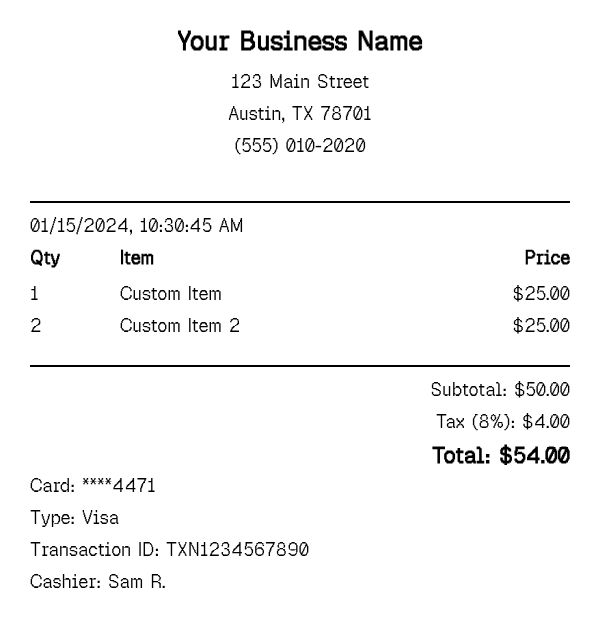
A receipt maker is a blank-canvas version of a receipt generator: instead of loading a design that already matches a specific store, you start with an empty layout and decide what goes on it. You choose whether there is a logo or a plain text header, which sections appear (items, tax, discount, payment method, date and time, a barcode block), and in what order they stack from top to bottom. The output is still a real, print-ready receipt — thermal-width formatting, auto-calculated totals, PDF export — but nothing about it is inherited from a brand template.
That block-by-block control is the whole point. Our other 100+ templates exist because most people want a receipt that already looks like Walmart, CVS, or Uber and just needs its details changed. A receipt maker is for the remaining case: a store, vendor, freelancer, or one-off transaction that does not match any of those formats, where you would rather assemble the exact fields you need than edit around fields you do not.
How to Make a Receipt From Scratch
- 1
Open a blank receipt and set your header
Skip the template gallery and open the editor directly. Enter your business or vendor name, address, and phone number in the header block, or upload a logo image if you have one — the header can be text-only, logo-only, or both, and you control the alignment.
- 2
Add and arrange the sections you actually need
Every part of the receipt below the header is its own toggleable block — items, subtotal/tax/discount, payment method, date and time, a transaction ID line, even an optional barcode. Turn off anything irrelevant to your transaction, and drag the remaining sections into the order you want them printed.
- 3
Enter line items and let the totals calculate themselves
Add each item with its name, quantity, and price. The editor sums the subtotal automatically, applies whatever tax rate or flat/percentage discount you set, and keeps the total in sync as you keep editing — no manual arithmetic, even after you add or remove a line.
- 4
Preview at receipt width and export the PDF
The live preview renders at true thermal-printer width (80mm by default, adjustable), so what you see is what prints. Once the layout looks right, download it as a print-ready PDF sized for either a receipt printer or standard paper.
Why Use Our Receipt Maker?
Full section control. add, remove, and reorder header, items, totals, payment, date/time, transaction, and barcode blocks independently.
No brand lock-in. nothing on the page assumes you are recreating a specific store — every field starts blank and stays exactly what you type.
Automatic totals. subtotal, tax, and discount recalculate live as you add or edit items, so the math is never left for you to check by hand.
Real thermal-printer formatting. the 80mm-width layout, spacing, and monospace receipt font match what comes out of an actual receipt printer, not a generic invoice template.
Optional barcode block. add a barcode section with custom text and size if your use case calls for one, or leave it off entirely.
Nothing to install or sign up for. the whole editor runs in your browser and the finished PDF downloads directly — no account, no software.
Who Uses a Receipt Maker?
Freelancers and independent contractors
issuing a simple proof-of-payment to a client without a full invoicing platform, especially for one-off or cash jobs.
Small shop or stall owners without a POS system
markets, pop-ups, and home-based sellers who need to hand a customer something printed but do not run register software.
Anyone documenting a store or vendor not in our template library
a local business, an independent seller, or a one-time transaction that does not match any of the 100+ brand-specific templates.
People rebuilding a very specific lost receipt
when the original had an unusual layout — extra notes, a nonstandard fee, a custom line item — that a fixed brand template would not reproduce accurately.
Receipt Maker vs Fake Receipt Generator
The receipt maker is for building a real record of a transaction that actually happened, for a business, vendor, or freelancer that you control the details of — you are the one filling in true line items, a true price, and a true date, just without a pre-made template to start from.
The fake receipt generator, by contrast, is built for mockups: a designer laying out a checkout screen, a developer generating sample data for an OCR pipeline, a prop department dressing a scene. It is optimized for producing plausible-looking sample receipts quickly, not for documenting one specific real purchase from scratch.
If you are recording something that actually happened, start here. If you need placeholder or sample receipts for design, testing, or props, use the fake receipt generator instead.
Tips for Building a Receipt From Scratch
- Turn off sections you do not need rather than leaving them blank — an empty tax line or unused barcode block looks less professional than simply not having it.
- If you operate in a state or country with no sales tax on your goods, set the tax rate to 0% instead of removing the totals section, so the subtotal and total still display cleanly.
- Keep item names specific ("Oil change — synthetic 5W-30" rather than "Service") — a generic receipt maker only looks authentic when the line items read like real ones.
Frequently Asked Questions
Start Building Your Receipt
Open the blank editor and add your own header, items, and sections — no template required.
Open the Editor